AUDUSD, “Australian Dollar vs US Dollar”
In the H4 chart, AUDUSD is trading close to the 5/8 level and may fall towards the support at the 3/8 one.
![AUDUSD1](/upload/content/medium/1.PNG)
![Risk Warning: the result of previous trading operations do not guarantee the same results in the future](/upload/content/medium/en.png)
As we can see in the H1 chart, the pair is trading below the 3/8 level and may continue falling to reach the 0/8 one.
![AUDUSD2](/upload/content/medium/2.PNG)
![Risk Warning: the result of previous trading operations do not guarantee the same results in the future](/upload/content/medium/en.png)
In the M15 chart, the pair may break the downside line of the VoltyChannel indicator and, as a result, continue moving downwards.
![AUDUSD3](/upload/content/medium/3.PNG)
![Risk Warning: the result of previous trading operations do not guarantee the same results in the future](/upload/content/medium/en.png)
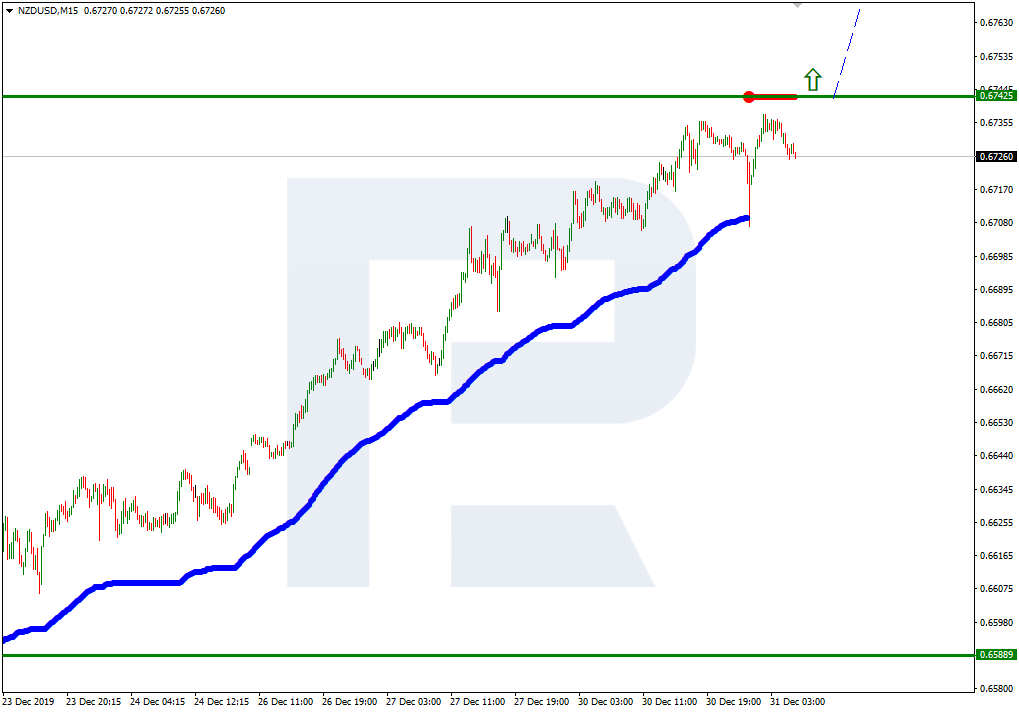
NZDUSD, “New Zealand Dollar vs US Dollar”
As we can see in the H4 chart, NZDUSD is no longer trading inside the “overbought zone”. In this case, the price may continue falling towards the support at the 5/8 level.
![NZDUSD1](/upload/content/medium/4.png)
![Risk Warning: the result of previous trading operations do not guarantee the same results in the future](/upload/content/medium/en.png)
In the H1 chart, the price my break the 5/8 level and continue trading downwards to reach the support at the 3/8 one.
![NZDUSD2](/upload/content/medium/5.png)
![Risk Warning: the result of previous trading operations do not guarantee the same results in the future](/upload/content/medium/en.png)
In the M15 chart, the pair may break the downside line of the VoltyChannel indicator and, as a result, continue falling.
![NZDUSD3](/upload/content/medium/6.png)
![Risk Warning: the result of previous trading operations do not guarantee the same results in the future](/upload/content/medium/en.png)